Embark on a creative journey with wooden spoon decoration ideas that ignite your imagination. From intricate paintings to exquisite carvings, discover endless possibilities to elevate these humble tools into stunning works of art.
Unleash your inner artist and explore a myriad of techniques, from delicate decoupage to mesmerizing pyrography, transforming each spoon into a unique masterpiece.
Decorative Painting Ideas
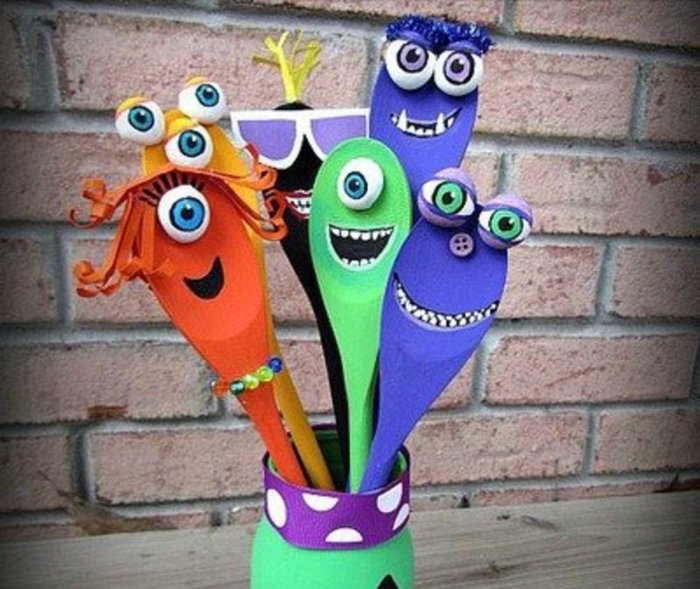
Transform your wooden spoons into vibrant masterpieces with decorative painting techniques. Unleash your creativity with stencils, decoupage, or freehand designs. Experiment with color combinations and patterns to create visually appealing works of art.
Add a touch of sophistication with metallic accents or achieve a rustic charm with distressed effects. Let your imagination soar and turn these humble utensils into eye-catching home décor.
Stenciling
- Choose stencils with intricate designs or playful motifs.
- Secure the stencil onto the spoon and apply paint with a sponge or brush.
- Create crisp lines and vibrant patterns by carefully lifting the stencil.
Decoupage
- Select decorative paper or fabric with vibrant patterns or images.
- Cut out the desired design and apply decoupage medium to the spoon.
- Carefully place the design onto the spoon and smooth out any wrinkles.
- Seal the design with additional layers of decoupage medium.
Freehand Designs
- Let your creativity flow and paint freehand designs directly onto the spoon.
- Use a variety of brush sizes and techniques to create unique patterns and motifs.
- Experiment with different colors and textures to add depth and interest.
Unique Finishes
- Add metallic accents by applying gold or silver paint to the edges or handles.
- Create a distressed effect by sanding or scraping the paint to reveal the wood grain.
- Experiment with different glazes or varnishes to enhance the depth and texture of the finish.
Carving and Engraving Designs
Unlock the artistry of carving and engraving on wooden spoons, transforming them into exquisite works of art.
Carving Styles
Carving techniques vary, each yielding distinct aesthetics:
-
-*Chip carving
Precisely cut geometric patterns using a chisel and mallet, creating intricate surface textures.
-*Relief carving
Carving designs in three dimensions, allowing for depth and dimensionality.
Carving Tool Selection
Choose the right tools for the job:
-
-*Chisels
Various sizes and shapes for precise cutting and shaping.
-*Gouges
Curved blades for creating rounded or concave surfaces.
-*Mallet
Provides force for controlled carving.
Engraving Techniques
Engraving involves etching designs onto the wood’s surface:
-
-*Pyrography
Using a heated tool to burn designs into the wood.
-*Knife engraving
Using a sharp knife to carefully carve lines and patterns.
-*Laser engraving
Employing a laser to precisely engrave designs with intricate details.
Safety and Precision
Prioritize safety:
- Wear protective gloves and eye protection.
- Use sharp tools to ensure precision and prevent splintering.
- Practice on scrap wood to master techniques before carving on your spoon.
Pyrography Patterns and Techniques
Pyrography, also known as wood burning, is an art form that involves using a heated tool to create intricate designs on wood. This ancient technique allows for the creation of beautiful and unique pieces that can range from simple patterns to complex works of art.
Process of Pyrography
The process of pyrography begins with selecting the right wood for the project. Softwoods like pine or basswood are easier to burn, while hardwoods like oak or maple require more heat and patience. Once the wood is selected, a pyrography tool is used to heat a metal tip to a high temperature.
This heated tip is then applied to the wood, creating a dark, burnt mark. By varying the pressure and temperature of the tool, different shades and textures can be created.
Creating Intricate Patterns and Designs, Wooden spoon decoration ideas
To create intricate patterns and designs with pyrography, it is important to have a steady hand and a good eye for detail. A variety of tips can be used to create different effects, from fine lines to bold strokes. By using multiple tips and varying the heat settings, artists can create a wide range of designs, including landscapes, portraits, and abstract patterns.
Safety Precautions and Equipment Recommendations
Pyrography can be a dangerous activity if not done properly. Always work in a well-ventilated area and wear a respirator to protect yourself from the fumes created by burning wood. It is also important to use a heat-resistant surface to protect your work surface from damage.When
selecting a pyrography tool, there are a few things to keep in mind. The wattage of the tool will determine how hot it can get, and the type of tip will determine the kind of lines you can create. It is also important to choose a tool that is comfortable to hold and use for extended periods of time.
Woodturning Embellishments

Woodturning is a versatile technique that allows artisans to create decorative embellishments for wooden spoons. This process involves using a lathe to rotate a piece of wood while shaping it with cutting tools.
Woodturning can be used to create a wide range of designs, including spindles, beads, and coves. These embellishments can add visual interest and texture to wooden spoons, making them both functional and beautiful.
Creating Turned Designs
- Spindles:Spindles are thin, cylindrical shapes that can be turned on the lathe. They are often used to create a decorative border around the rim of a spoon or to add a touch of elegance to the handle.
- Beads:Beads are small, round shapes that can be turned on the lathe. They are often used to create a decorative accent on the handle or bowl of a spoon.
- Coves:Coves are concave shapes that can be turned on the lathe. They are often used to create a smooth transition between the handle and the bowl of a spoon or to add a touch of depth to the design.
Finishing and Enhancing Turned Pieces
- Sanding:Sanding is an essential step in finishing turned pieces. It helps to smooth out the surface of the wood and remove any rough edges.
- Oiling:Oiling is a good way to protect turned pieces from moisture and wear. It also helps to bring out the natural beauty of the wood.
- Waxing:Waxing is another way to protect turned pieces and give them a lustrous finish.
Inlay and Marquetry Ideas
Inlay and marquetry are decorative techniques that involve embedding different materials into wood to create intricate patterns and images. Inlay involves inserting small pieces of material, such as wood, metal, or shell, into recesses carved into the wood surface. Marquetry, on the other hand, involves creating larger, more complex designs by piecing together thin veneers of different colors and grains.
Selecting and Preparing Materials
The choice of materials for inlay and marquetry depends on the desired design and the durability required. For inlay, hard materials such as metal, bone, or gemstone provide a sharp contrast to the wood. For marquetry, thin veneers of exotic woods, such as mahogany, ebony, or rosewood, offer a wide range of colors and textures.
Before starting an inlay or marquetry project, the wood surface must be carefully prepared. The wood should be smooth and free of any defects. The recesses for inlay should be precisely carved, and the veneers for marquetry should be cut to the exact size and shape.
Design Ideas
Inlay and marquetry designs can range from simple geometric patterns to elaborate scenes depicting people, animals, or landscapes. For inlay, geometric designs such as diamonds, squares, or triangles create a striking contrast to the wood grain. For marquetry, more complex designs can be created by combining different veneers to create a mosaic-like effect.
When designing an inlay or marquetry piece, it is important to consider the scale of the design and the size of the wood surface. Smaller designs are more suitable for small objects, while larger designs can be used on larger pieces of furniture or architectural elements.
Stenciling and Stamping Techniques
Unlock the world of intricate embellishments with stenciling and stamping! These techniques allow you to add beautiful designs to your wooden creations with precision and ease. Dive into the details and discover how to elevate your wooden masterpieces.
Creating Custom Stencils
- Design your pattern using a drawing or graphics software.
- Transfer the design onto a durable material like Mylar or acetate.
- Cut out the negative space, leaving the design raised.
Selecting Appropriate Stamps
- Choose stamps with sharp, well-defined designs.
- Consider the size and scale of the stamp relative to your project.
- Select stamps made from durable materials like rubber or silicone.
Stenciling Techniques
- Secure the stencil onto the wood surface using tape or adhesive.
- Apply paint or ink through the stencil using a brush, sponge, or spray.
- Remove the stencil carefully to reveal the crisp, clean design.
Stamping Techniques
- Dip the stamp into ink or paint.
- Press the stamp firmly onto the wood surface.
- Lift the stamp straight up to avoid smudging.
Decoupage and Papercraft Embellishments
Add a touch of charm to your wooden spoons with decoupage and papercraft techniques. Decoupage involves adhering paper or fabric cuttings onto a surface, while papercraft encompasses a wide range of decorative techniques using paper.
Selecting and Preparing Materials
For decoupage, choose thin, decorative papers or napkins. For papercraft, consider using cardstock, scrapbook paper, or even origami paper. Prepare the wooden spoon by sanding it smooth and applying a base coat of paint or primer.
Decoupage Techniques
- Mod Podge Method:Apply a layer of Mod Podge to the spoon and the paper cutting. Place the paper on the spoon and smooth out any wrinkles. Seal with additional Mod Podge layers.
- Glue Stick Method:Use a glue stick to adhere the paper to the spoon. Press firmly and smooth out any bubbles.
Papercraft Techniques
- Origami:Fold paper into intricate shapes and glue them onto the spoon for unique embellishments.
- Quilling:Roll strips of paper into coils and glue them together to create decorative designs.
- Paper Weaving:Interlace strips of paper to create patterns and textures on the spoon.
Weaving and Macrame Embellishments: Wooden Spoon Decoration Ideas
Weaving and macrame are versatile techniques that add intricate patterns and textures to wooden spoons. Weaving involves interlacing threads or yarns to create decorative designs, while macrame utilizes knots to form intricate patterns.
Weaving Patterns and Techniques
Experiment with different weaving patterns to create unique embellishments. Simple over-and-under weaving creates basic grids, while more complex patterns like twill or herringbone add depth and visual interest. Choose contrasting colors or textures to enhance the visual impact.
Incorporating Weaving into Wooden Spoon Designs
Weaving can be incorporated into wooden spoon designs in various ways. Wrap woven threads around the handle for a decorative grip. Create a woven panel on the spoon’s bowl for a unique focal point. Use woven strips to create a tassel or fringe for added flair.
Macrame Knots and Patterns
Macrame involves using a series of knots to create intricate patterns. Basic knots like the square knot and half hitch form the foundation for more complex designs. Experiment with different knot combinations to create unique textures and embellishments.
Incorporating Macrame into Wooden Spoon Designs
Macrame can be used to embellish wooden spoons in a variety of ways. Tie a macrame wrap around the handle for a secure and decorative grip. Create a macrame tassel or fringe to add a touch of whimsy to the spoon’s bowl.
Use macrame knots to create a decorative border around the spoon’s rim.
Resin and Epoxy Embellishments

Resin and epoxy are versatile materials that can be used to create stunning embellishments for wooden spoons. Resin can be tinted with pigments or dyes to create a variety of colors and effects, and epoxy can be used to create a clear, protective finish.To
use resin and epoxy for decorative purposes, you will need to mix the two components according to the manufacturer’s instructions. Once the resin and epoxy are mixed, you can pour it into a mold or onto the surface of the wooden spoon.
If you are using a mold, be sure to release the resin from the mold once it has cured.
Mixing and Pouring Resin
When mixing resin and epoxy, it is important to follow the manufacturer’s instructions carefully. The ratio of resin to epoxy will vary depending on the product you are using. Once the resin and epoxy are mixed, you will need to pour it into a mold or onto the surface of the wooden spoon.
If you are pouring the resin onto the surface of the wooden spoon, be sure to use a level surface and pour slowly to avoid creating bubbles.
Creating Unique and Eye-Catching Resin Embellishments
There are many different ways to create unique and eye-catching resin embellishments. You can add pigments or dyes to the resin to create a variety of colors and effects. You can also embed objects in the resin, such as beads, glitter, or flowers.
If you are using a mold, you can create complex shapes and designs.
Closing Summary
Whether you seek inspiration for personal projects or unique home decor, wooden spoon decoration ideas offer a boundless canvas for your creativity. Embrace the art of embellishment and elevate everyday objects into extraordinary expressions of beauty.
Expert Answers
What materials are suitable for wooden spoon decoration?
Wood spoons made of durable hardwoods like oak or maple are ideal for most decoration techniques.
Can I use acrylic paints for wooden spoon decoration?
Yes, acrylic paints are versatile and suitable for wooden surfaces. However, seal the paint with a clear finish to protect it from wear and tear.
How do I prevent the wood from cracking during carving?
Soak the spoon in water for a few hours before carving to soften the wood and reduce the risk of splitting.