Prepare to be inspired as we dive into the realm of playhouse paint ideas, where creativity and imagination take center stage. From whimsical themes to vibrant patterns, this guide will empower you to transform your child’s playhouse into an extraordinary wonderland.
Let your imagination soar as we explore color schemes that evoke joy, themes that ignite dreams, and techniques that bring texture and depth to your playhouse. Unleash the artist within and create a space where every brushstroke sparks a new adventure.
Color Schemes
When selecting colors for your playhouse, consider the psychological effects of different hues on children. Warm colors like red, orange, and yellow stimulate energy and creativity, while cool colors like blue, green, and purple promote relaxation and imagination. Gender-neutral options like white, gray, and beige provide a versatile backdrop for a variety of play themes.
Traditional Schemes
Traditional playhouse color schemes often evoke a sense of nostalgia and whimsy. Consider classic combinations like red and white, blue and yellow, or green and white. These pairings create a cheerful and inviting atmosphere that encourages imaginative play.
Modern Schemes
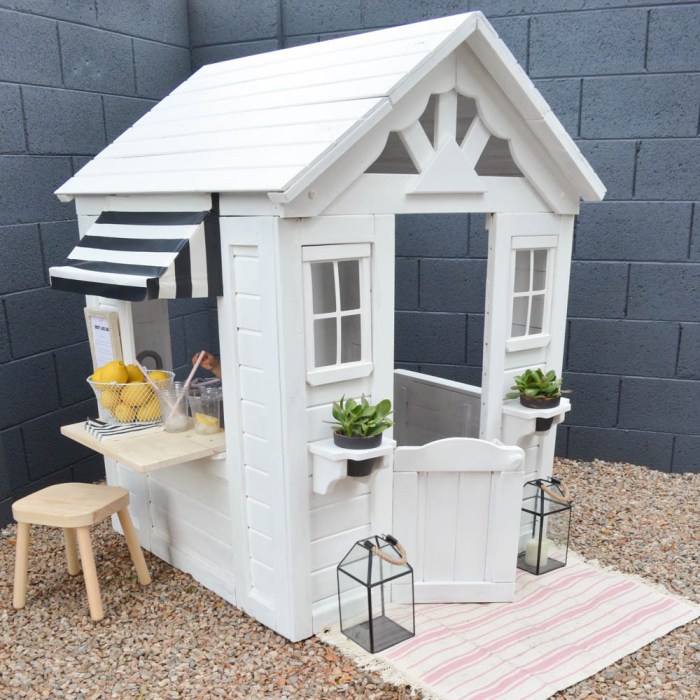
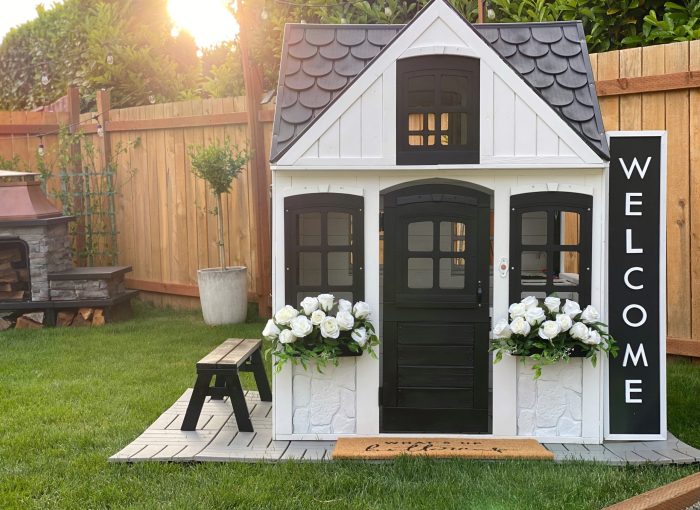
For a more contemporary look, opt for modern color schemes that incorporate bold and contrasting hues. Try pairing black and white for a sleek and sophisticated look, or use bright colors like pink, turquoise, and yellow to create a vibrant and playful space.
Gender-Neutral Schemes
If you want a playhouse that can be enjoyed by children of all genders, choose gender-neutral color schemes. White, gray, and beige are versatile options that can be paired with a variety of accent colors to create a unique and inviting space.
Themes and Murals
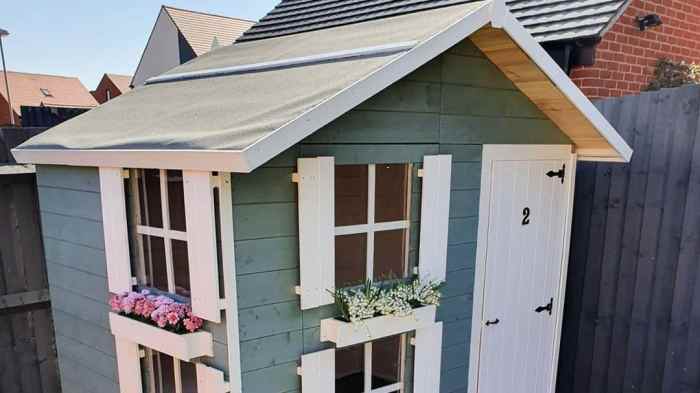
Playhouse designs can be transformed into captivating realms with imaginative themes and murals. From enchanting fairy tales to serene nature scenes or thrilling adventure landscapes, the possibilities are endless.To incorporate these themes into the paint job, consider using stencils for intricate patterns, hand-painting for personalized details, or creating full-blown murals that bring the theme to life.
Fairy Tale Themes
Indulge in the magic of fairy tales by painting whimsical castles, lush forests, and beloved characters. Stencils can create delicate flower patterns, while hand-painted details can add charming touches like sparkling stars or twinkling fireflies.
Nature Scenes
Bring the outdoors in with vibrant nature scenes. Paint rolling hills, towering trees, and tranquil streams. Stencils can help create realistic foliage, while hand-painted details can add lifelike birds, butterflies, or other creatures.
Adventure Landscapes
Embark on thrilling adventures with rugged mountains, roaring oceans, or vast deserts. Stencils can create dynamic rock formations, while hand-painted details can add dramatic clouds, cascading waterfalls, or exotic animals.
Patterns and Textures
Unlock the potential of your playhouse’s exterior with patterns and textures that ignite creativity. Unleash the magic of stripes, embrace the whimsy of polka dots, or transform the walls into a rustic haven with faux wood grain.
Embrace the versatility of paint rollers, sponges, and an array of tools to create stunning effects. Let your imagination soar as you explore techniques that elevate the playhouse from ordinary to extraordinary.
Stripes
- Tape it Up:Define clean lines with painter’s tape, creating crisp stripes that add a touch of classic elegance.
- Freehand Frenzy:Unleash your inner artist with a freehand approach, painting stripes of varying widths and angles for a playful and dynamic look.
- Roller Rhythm:Embrace the efficiency of paint rollers, using them to create even and consistent stripes that enhance the playhouse’s overall aesthetic.
Polka Dots
- Sponge Delight:Transform ordinary sponges into polka dot makers, dipping them in paint and dabbing them onto the playhouse’s surface for a charming and whimsical effect.
- Q-tip Magic:Exercise precision with Q-tips, using them to create delicate and evenly spaced polka dots that add a touch of playfulness.
- Stencils Unleashed:Introduce intricate patterns with stencils, allowing you to paint polka dots of various sizes and designs with ease.
Faux Wood Grain
- Sponging Technique:Create the illusion of wood grain by dabbing a sponge dipped in a darker paint color onto the playhouse’s surface, followed by a lighter color to highlight the grain.
- Comb and Brush:Simulate the texture of wood by running a comb or brush through the wet paint, creating grooves that resemble the natural patterns found in wood.
- Dry Brushing:Apply a light coat of paint using a dry brush, allowing the underlying color to peek through, mimicking the aged and weathered look of real wood.
Stencils and Decals
Elevate your playhouse with the magic of stencils and decals! These versatile tools allow you to incorporate intricate designs, beloved characters, and whimsical patterns onto your playhouse’s surfaces.
Choosing stencils and decals is an art form. Opt for designs that complement the playhouse’s theme and size. Ensure the stencils are made of durable materials, such as Mylar or vinyl, for multiple uses. Decals, on the other hand, are self-adhesive and come in various materials, including vinyl, paper, and fabric.
Application Techniques
-
For stencils, secure them with painter’s tape and apply paint using a brush or sponge. Dabbing or stippling motions yield the best results.
-
With decals, clean the surface thoroughly before application. Peel off the backing and gently press the decal onto the desired spot, smoothing out any air bubbles.
Chalkboard and Magnetic Paint: Playhouse Paint Ideas
Integrating chalkboard or magnetic paint into your playhouse design offers an array of benefits. Chalkboard paint transforms walls into interactive surfaces, encouraging creativity and expression. Kids can unleash their artistic flair, draw masterpieces, or jot down their wildest imaginations. Magnetic paint, on the other hand, provides a magnetic surface where toys, artwork, or educational materials can be effortlessly attached and rearranged, fostering imaginative play and organization.
Designated Areas
When incorporating chalkboard or magnetic paint, it’s crucial to create designated areas to avoid overwhelming the space. For chalkboard paint, consider painting a specific wall or section, creating a dedicated zone for artistic endeavors. Similarly, for magnetic paint, designate a particular area for magnetic play, ensuring a focused and organized play experience.
Glow-in-the-Dark Paint
Unlock the secrets of glow-in-the-dark paint and transform your playhouse into an enchanting nocturnal wonderland. With its ability to absorb light during the day and emit a soft glow at night, this paint opens up endless possibilities for creating magical and whimsical experiences.
Enhancing Imagination
- Paint celestial patterns on the ceiling, letting stars and constellations twinkle in the darkness.
- Create a glow-in-the-dark mural depicting a forest scene, with fireflies dancing amidst the trees.
- Use glow-in-the-dark paint to Artikel the borders of furniture, creating a safe and guided path for nighttime play.
Safety and Practicality
- Paint the edges of steps and obstacles with glow-in-the-dark paint to enhance visibility and prevent nighttime accidents.
- Create a glow-in-the-dark “nightlight” by painting a small area of the wall near the door, providing a comforting glow for children who fear the dark.
- Use glow-in-the-dark paint to mark the boundaries of the playhouse, making it easier to locate in low-light conditions.
Safety Considerations
When it comes to painting playhouses, safety is paramount. The little ones will be spending countless hours in their play haven, so it’s crucial to ensure the paints you use are non-toxic and child-friendly. Look for paints specifically designed for children’s play areas or those that meet safety standards like EN 71-3 or ASTM D-4236.
Proper Ventilation
Proper ventilation is key when painting with children. The fumes from paints can be harmful, so always ensure there is adequate airflow. Open windows and doors, or set up a fan to circulate the air. It’s also a good idea to take breaks and step outside for fresh air if you’re painting for an extended period.
Weatherproofing
Weatherproofing the playhouse paint job is crucial to protect it from the elements and ensure its longevity. Choose durable paints specifically designed for outdoor use, which offer resistance to fading, peeling, and cracking. Apply a protective sealant to the painted surface to further enhance its durability and water resistance.
Paint Selection
Opt for paints labeled as “exterior” or “weather-resistant” that are formulated to withstand harsh weather conditions. Consider paints with UV-resistant pigments to prevent fading caused by sunlight.
Maintenance and Touch-Ups
Regular maintenance and touch-ups are crucial to preserve the beauty of your playhouse paint job. Cleaning, repairing, and repainting as needed will ensure your playhouse continues to provide a vibrant and inviting space for kids.
Cleaning
Regularly clean the playhouse surfaces with a mild detergent and water to remove dirt and grime. Avoid using harsh chemicals or abrasive cleaners, as these can damage the paint.
Repairs
Inspect the playhouse regularly for any chips, cracks, or peeling paint. Repair these areas promptly to prevent further damage. Use a matching paint color and follow the manufacturer’s instructions for application.
Repainting, Playhouse paint ideas
As needed, repaint the playhouse to restore its vibrant colors and protect the wood. Clean and prepare the surface thoroughly before painting, and apply multiple thin coats of paint for best results.
Creative Lighting
Illuminate your playhouse with creative lighting to transform the space and enhance the play experience. From whimsical fairy lights to vibrant lanterns, explore how lighting can set the mood and inspire imaginations.
Incorporate color-changing LEDs to create dynamic effects, casting a kaleidoscope of hues across the playhouse. Position lights strategically to highlight specific areas, creating cozy nooks and illuminating play zones.
Fairy Lights
- String delicate fairy lights around the perimeter of the playhouse, creating a magical, twinkling ambiance.
- Drape them over curtains or hang them from the ceiling, casting a soft, ethereal glow.
- Consider battery-operated fairy lights for easy placement and portability.
Lanterns
- Introduce colorful lanterns to add a touch of whimsy and ambiance.
- Hang paper lanterns from the ceiling or place them on shelves, casting warm, diffused light.
- Choose lanterns with intricate designs or bright patterns to enhance the visual appeal.
Color-Changing LEDs
- Install color-changing LED strips or panels to create dynamic lighting effects.
- Control the colors and brightness remotely, transforming the playhouse from a cozy haven to an energetic play zone.
- Use color-changing LEDs to simulate natural light, creating a sunrise or sunset ambiance.
Accessories and Embellishments
Spruce up your playhouse with a dash of charm and personality. Accessories and embellishments can transform it into a whimsical wonderland.
Incorporate these elements seamlessly by matching their colors to your paint scheme. For instance, a pastel-painted playhouse would look delightful with pastel-hued wind chimes or a painted sign with a cheerful message.
Painted Signs
- Create custom signs with the playhouse name, rules, or inspirational quotes.
- Choose durable paint that can withstand weather conditions.
- Hang the signs on the walls or door for a touch of personalization.
Wind Chimes
- Add a soothing touch with wind chimes made of wood, metal, or seashells.
- Suspend them from the eaves or porch for a gentle melody when the wind blows.
- Select chimes with colors that complement the playhouse exterior.
Weather Vanes
- Top the playhouse with a weather vane for a classic and functional touch.
- Choose a vane with a whimsical design, such as a horse, sailboat, or animal silhouette.
- Ensure it’s made of durable materials to withstand the elements.
Last Word
As you embark on this artistic journey, remember that the possibilities are endless. Embrace the magic of glow-in-the-dark paint, incorporate practical elements like chalkboard and magnetic paint, and don’t forget the finishing touches that make your playhouse truly unique. With careful planning and a touch of creativity, your playhouse will become a cherished haven where imaginations flourish and memories are made.
FAQ Compilation
What are some popular color schemes for playhouses?
Consider traditional hues like pastel blues and pinks, modern neutrals like gray and white, or gender-neutral options like shades of green and yellow.
How can I incorporate themes into my playhouse paint job?
Fairy tale scenes, nature landscapes, or underwater adventures can be brought to life using murals, stencils, or hand-painted details.
What techniques can I use to create patterns and textures on my playhouse?
Experiment with stripes, polka dots, or faux wood grain using paint rollers, sponges, or brushes.
