Fill your own bauble ideas – Step into the enchanting realm of fill-your-own bauble ideas, where imagination takes flight and festive spirits soar. From materials to shapes, embellishments to themes, this guide is your creative compass, empowering you to craft one-of-a-kind ornaments that reflect your unique style and spread holiday cheer.
Let’s dive into a world of endless possibilities, where each bauble becomes a canvas for your artistry and a cherished keepsake for years to come.
Bauble Materials
Creating DIY baubles offers a fantastic opportunity to express your creativity and add a personal touch to your holiday décor. The choice of materials for baubles is vast, ranging from traditional to unconventional and sustainable options. Here’s a comprehensive guide to help you select the perfect materials for your baubles:
Traditional Materials
Traditional bauble materials include glass, ceramic, and metal. Glass baubles are known for their delicate beauty and come in various shapes, sizes, and colors. Ceramic baubles offer a more rustic charm and can be painted or glazed to create unique designs.
Metal baubles, often made from brass or silver, add a touch of elegance and durability to your tree.
Unconventional Materials
If you’re looking for something more unique, consider using unconventional materials such as wood, fabric, or paper. Wood baubles can be carved or painted to create intricate designs, while fabric baubles add a cozy and homely feel to your décor.
Paper baubles, made from origami or decoupage techniques, offer endless possibilities for customization.
Sustainable Materials
For those who prioritize sustainability, there are several eco-friendly options available. Recycled paper, cardboard, or fabric scraps can be transformed into beautiful baubles. Natural materials like pinecones, acorns, or twigs can also be used to create rustic and charming ornaments.
By choosing sustainable materials, you can reduce your environmental impact while still enjoying the joy of crafting.
Bauble Shapes
Beyond the classic sphere, baubles come in an array of captivating shapes, each adding a unique touch to your festive decor.
Embrace intricate forms like teardrops, stars, hearts, and snowflakes. These elegant silhouettes lend a touch of whimsy and sophistication to your tree.
Unconventional Shapes
For a truly unconventional twist, explore baubles shaped like animals, fruits, or even musical instruments. These playful designs will add a dash of personality and cheer to your holiday display.
Bauble Embellishments
Embellishing baubles is a fun and creative way to add a personal touch to your holiday decor. There are many different techniques you can use to embellish baubles, so get creative and have fun!
One of the most popular ways to embellish baubles is to add glitter. You can use fine glitter, chunky glitter, or even holographic glitter. To add glitter to a bauble, simply apply a thin layer of glue to the surface of the bauble and then sprinkle on the glitter.
You can also use a paintbrush to apply the glitter for more control.
Another popular way to embellish baubles is to add beads. You can use seed beads, glass beads, or even plastic beads. To add beads to a bauble, simply glue them to the surface of the bauble. You can create patterns or designs with the beads, or you can simply glue them on randomly.
If you want to add a more personal touch to your baubles, you can paint them. You can use acrylic paint, enamel paint, or even nail polish. To paint a bauble, simply apply a thin layer of paint to the surface of the bauble and let it dry.
You can then add additional layers of paint or embellishments as desired.
Other Embellishments
- Fabric: Cut fabric into shapes and glue them to the bauble.
- Lace: Wrap lace around the bauble and secure it with glue.
- Ribbon: Tie ribbon around the bauble or use it to create bows.
- Sequins: Glue sequins to the bauble for a sparkly effect.
- Pom-poms: Glue pom-poms to the bauble for a festive touch.
- Bells: Glue bells to the bauble for a jingle-jangle effect.
- Candy canes: Glue candy canes to the bauble for a sweet treat.
Bauble Themes
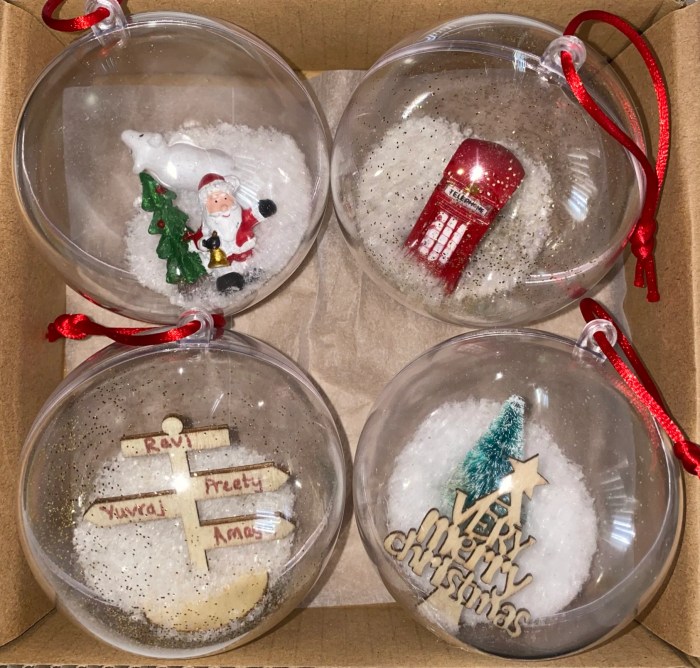
From classic Christmas motifs to unique cultural designs, there’s a theme for every taste and occasion. Explore popular ideas for DIY baubles.
These themes can be seasonal, cultural, or personalized, reflecting your style and interests.
Seasonal Themes
- Christmas:Red, green, and gold baubles adorned with reindeer, snowmen, and Christmas trees.
- Halloween:Black and orange baubles with pumpkins, bats, and spiders.
- Easter:Pastel-colored baubles with bunnies, chicks, and eggs.
Cultural Themes
- Scandinavian:Baubles with minimalist designs inspired by Nordic patterns.
- Japanese:Baubles decorated with traditional Japanese motifs like cherry blossoms and origami cranes.
- Native American:Baubles adorned with feathers, beads, and geometric designs.
Personalized Themes
- Photo memories:Baubles filled with photos of loved ones or special moments.
- Hobby-inspired:Baubles decorated with elements related to your hobbies, such as music, painting, or sports.
- Travel souvenirs:Baubles adorned with items from your travels, like maps, landmarks, or local crafts.
Bauble Techniques
Creating baubles involves various techniques that transform ordinary materials into festive decorations. These techniques range from simple decoupage to intricate knitting, each offering unique possibilities for personalization and creativity.
The step-by-step process of creating baubles includes:
- Gathering materials
- Preparing the bauble base
- Applying embellishments
- Finishing touches
Decoupage
Decoupage involves adhering cut-out paper or fabric images onto a bauble base, creating a unique and personalized design. Here’s a step-by-step guide:
- Gather materials: paper or fabric images, bauble base, decoupage glue, brush
- Prepare the bauble base: Clean and dry the bauble surface.
- Cut out images: Select and cut out desired images from paper or fabric.
- Apply glue: Apply a thin layer of decoupage glue to the back of the image.
- Adhere image: Place the image onto the bauble and smooth out any wrinkles.
- Seal: Apply a final layer of decoupage glue over the entire image to seal and protect it.
Paper-Mâché, Fill your own bauble ideas
Paper-mâché involves layering paper strips onto a bauble base to create a sturdy and customizable decoration. Here’s a step-by-step guide:
- Gather materials: newspaper or paper strips, bauble base, glue, water, brush
- Prepare the bauble base: Clean and dry the bauble surface.
- Create paper strips: Tear or cut newspaper or paper into strips.
- Mix glue: Dilute glue with water to create a paste-like consistency.
- Apply paper strips: Dip a paper strip into the glue mixture and apply it to the bauble base.
- Layer strips: Repeat the process, layering paper strips until the desired thickness is achieved.
- Dry: Allow the paper-mâché to dry completely.
- Decorate: Paint or embellish the dried paper-mâché as desired.
Knitting
Knitting involves using yarn and knitting needles to create a cozy and festive bauble. Here’s a step-by-step guide:
- Gather materials: yarn, knitting needles, scissors
- Cast on stitches: Create a loop of yarn on the knitting needle.
- Knit: Pass the right-hand needle through the loop on the left-hand needle and lift it over the left-hand needle.
- Repeat: Continue knitting until the desired length is reached.
- Bind off: Decrease the number of stitches on the needle until only one stitch remains.
- Cut yarn: Cut the yarn, leaving a tail.
- Pull yarn through: Pull the tail of yarn through the last stitch to close the opening.
Bauble Inspiration
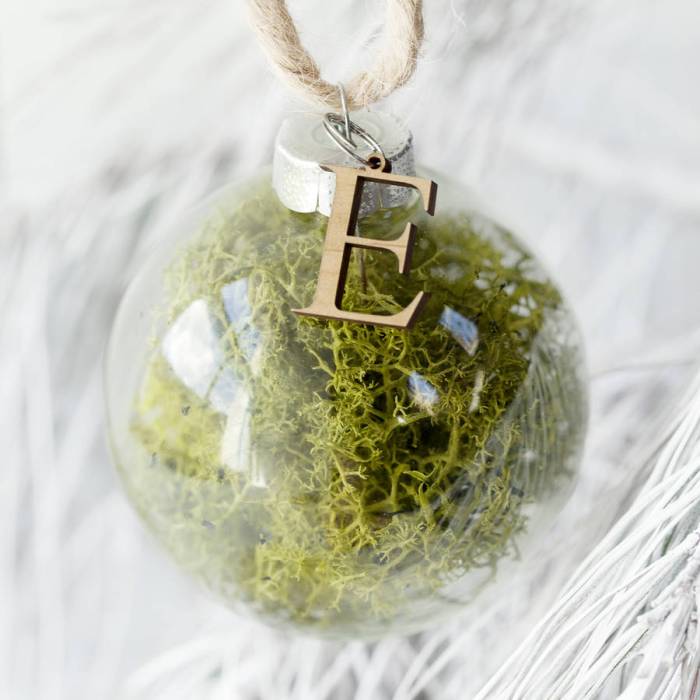
Explore a captivating gallery of inspiring bauble designs, showcasing a kaleidoscope of styles, colors, and patterns. Immerse yourself in the boundless creativity of these enchanting ornaments.
From classic elegance to whimsical whimsy, this curated collection will spark your imagination and provide endless inspiration for your own festive creations.
Traditional Styles
Embrace the timeless charm of traditional bauble designs, featuring classic colors like red, green, gold, and silver. Intricate patterns, such as snowflakes, stripes, and polka dots, evoke a nostalgic sense of Christmas past.
Bauble Display
Unleash your creativity and showcase your DIY baubles in captivating ways. From enchanting garlands to festive wreaths and elegant centerpieces, the possibilities are endless.
Festive Garlands
String your baubles along twinkling fairy lights or ribbon for a whimsical garland. Alternate different shapes, sizes, and colors to create a visually striking display. Consider adding natural elements like pine cones or holly berries for a touch of rustic charm.
Festive Wreaths
Transform a simple wreath base into a festive masterpiece by adorning it with DIY baubles. Use a hot glue gun to secure the baubles, overlapping them for a lush effect. Add bows, ribbons, or bells for an extra touch of holiday cheer.
Centerpieces
Create a stunning centerpiece by filling a clear vase or bowl with baubles. Mix and match colors, shapes, and textures to create a captivating display. Submerge the baubles in water for a shimmering effect, or add floating candles for a touch of ambiance.
Bauble Storage
Storing your DIY baubles properly is crucial to ensure their longevity and prevent damage. Here are some tips to help you organize and protect your precious creations:
Materials for Storage
- Use acid-free tissue paper or bubble wrap to wrap each bauble individually, providing a protective layer.
- Store baubles in sturdy cardboard boxes or plastic containers with lids, ensuring they are not crushed or scratched.
- Consider using dividers or compartments within the storage containers to keep baubles separate and organized.
Bauble Gifting
Baubles are a thoughtful and festive gift, perfect for spreading holiday cheer. Personalize them to make them even more meaningful and special.
Consider the recipient’s interests, hobbies, or personality when choosing a bauble design. For example, a music lover might appreciate a bauble adorned with musical notes, while a nature enthusiast might prefer one with a woodland scene.
Personalizing Baubles
- Add a photo of the recipient or a cherished memory.
- Hand-paint or draw a special design or message.
- Attach small charms or trinkets that hold sentimental value.
- Write a heartfelt note or poem on a small piece of paper and insert it into the bauble.
Packaging and Presentation
Wrap the bauble in tissue paper or a small gift bag and tie it with a ribbon.
Create a festive display by placing the bauble in a small basket or bowl filled with other holiday decorations.
Add a personalized gift tag with a special message or the recipient’s name.
Summary: Fill Your Own Bauble Ideas
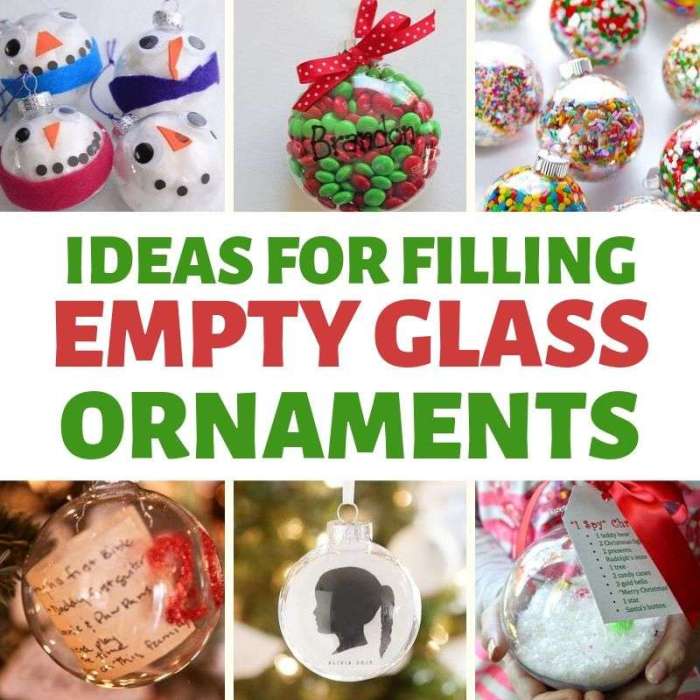
As we bid farewell to this festive journey, may your fill-your-own bauble creations bring joy to your holiday celebrations and serve as a testament to your boundless creativity. Remember, the true magic lies not just in the finished product, but in the memories made along the way.
FAQ
What materials are best for making DIY baubles?
From classic glass to sustainable paper-mâché, the choice is yours! Experiment with different materials to create unique textures and effects.
How can I make my baubles stand out?
Embellish them with glitter, beads, paint, ribbons, and more. Let your creativity shine through and make each bauble a work of art.
What are some popular themes for DIY baubles?
From traditional holiday motifs to whimsical designs, the possibilities are endless. Choose a theme that reflects your style and creates a cohesive look for your tree.
